readLine()をシーケンスのように扱う
Swiftでコンソールアプリを作るときの、標準入力から得た文字列をコレクションのように扱う方法です。
標準入力を扱う処理をシンプルに書く場合、readLine()関数と繰り返しを使って次のようにすることが多いです。
while let line = readLine() {
    // 入力された行に対する処理
}
ループを回して、行単位で得られた値をループ内で処理する、という方法です。よく見ます。
これはこれで必要十分なのですが、これをもっとコレクションのようにして、たとえばmap()やflatMap()と組み合わせて使いたいと思いました。
// 以下はイメージ
readLinesIterator().filter{ … }.map{ … }
なにかいい方法はないものかと調べていたら、いつものStackOverflowにこんな回答を見つけました。
リンク先はswiftのバージョンが古いので、今風に書き直してみます。
AnyIterator{ readLine() }.filter{ … }.map{ … }
readLine()をAnyIteratorでラップしてあげるだけというお手軽さです。
これで処理を宣言的にも書けるようになり、とても便利な世界が待っています。
lldbで変数をpで見るとき16進数やASCII文字で表示する
lldbでpコマンドを使って表示するときに、pに続けて/xや/cなどを続けると指定した形式で出力してくれます。
(lldb) p depthData.depthDataType ← 「kCVPixelFormatType_DisparityFloat16('hdis')」が入っている
(OSType) $R4 = 1751411059

(lldb) p/x depthData.depthDataType
(OSType) $R2 = 0x68646973

(lldb) p/c depthData.depthDataType
(OSType) $R3 = sidh
これは元々gdbのコマンドのようです。
残念ながらpoには使えないのですが、CoreVideoやCoreAudioなどで出てくる4文字相当の値(kCVPixelFormatType_DisparityFloat16やkCVPixelFormatType_DisparityFloat32など)を調べたいときには便利です。
Homebrewを使ってOpenCVをmacOSにインストール(2018/1/20版)
気づいたら前回の記事から1年近く空いてますね…。
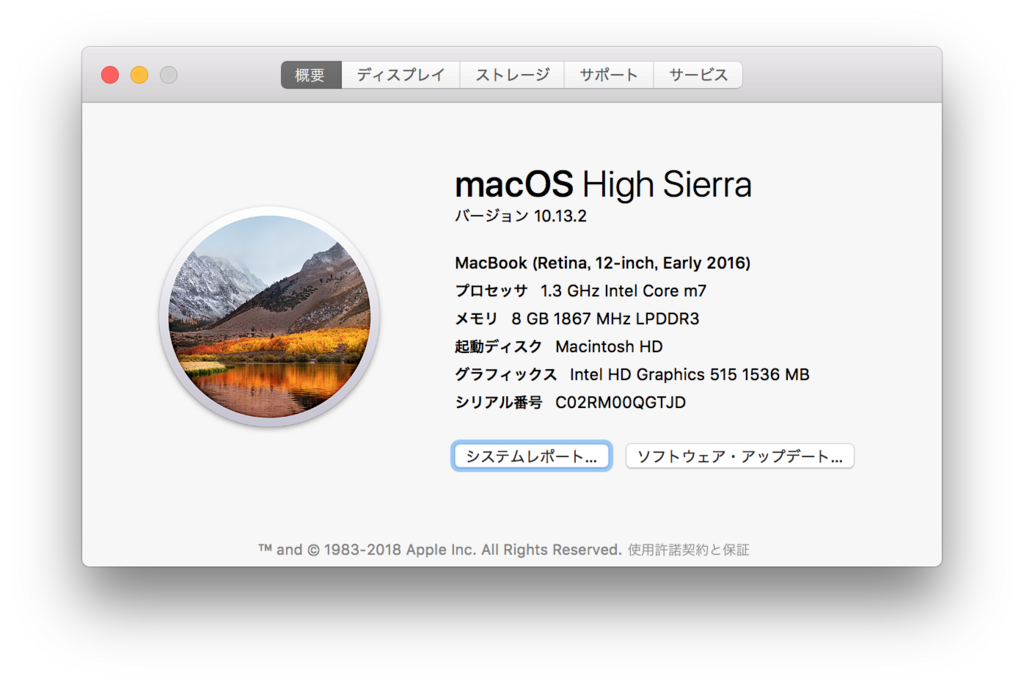
OpenCVをHomebrewを使いmacOSにインストールしようとしたときのメモです。2018/1/20時点で「OpenCV mac install」などと検索したときに出てくる方法と、今は少し手順が異るようです。
環境

% brew -v
Homebrew 1.5.0
Homebrew/homebrew-core (git revision 98ea2; last commit 2018-01-19)
インストール
ぐぐると「最初にbrew tap homebrew/scienceを実行してね」と出てきます。
ところがhomebrew-scienceのGithubリポジトリを覗いてみると、なんと大きく「 deprecated」の文字が。
今はhomebrew-science自体がなくなってしまったのですね。
それではとbrew info opencvを見てみると、3.4.0がインストールされるように整備されていました。homebrew-scienceのときには豊富に用意されていたビルドオプションなどもありません。
% brew info opencv --all
opencv: stable 3.4.0 (bottled)
Open source computer vision library
https://opencv.org/
Not installed
From: https://github.com/Homebrew/homebrew-core/blob/master/Formula/opencv.rb
==> Dependencies
Build: cmake ✘, pkg-config ✘
Required: eigen ✘, ffmpeg ✘, jpeg ✘, libpng ✘, libtiff ✘, openexr ✘, python ✘, python3 ✘, numpy ✘, tbb ✘
Windows向けバイナリをOpenCV本家からインストールすると、opencv_world340.dllというようにフルセットの環境が手に入るよう出来ていますが、同じ流れなのでしょうか。
というわけで、シンプルにbrew install opencv。関連するパッケージも一緒にインストールされました。
% brew install opencv
 : <中略>
==> Summary
🍺  /usr/local/Cellar/opencv/3.4.0_1: 531 files, 97.7MB
Python
これで、/usr/local/bin/なpythonでimport cv2が使えるようになりました。
% which python3
/usr/local/bin/python3
% which python2
/usr/local/bin/python2
% python3
Python 3.6.4 (default, Jan 20 2018, 08:46:32)
[GCC 4.2.1 Compatible Apple LLVM 9.0.0 (clang-900.0.39.2)] on darwin
Type "help", "copyright", "credits" or "license" for more information.
>>> import cv2
>>>
%  python2
Python 2.7.14 (default, Jan 20 2018, 08:42:54)
[GCC 4.2.1 Compatible Apple LLVM 9.0.0 (clang-900.0.39.2)] on darwin
Type "help", "copyright", "credits" or "license" for more information.
>>> import cv2
>>>
ちなみにOpenCV3だとimport cvやimport cv2.cvはできなくてもOKなのですね。知りませんでした。
問題発生
…上記でうまくいくと思いきや、imshow()が動きません。画像は表示されるものの、その後Windowがフリーズして一切動かせなく鳴ってしまうのです。なんだろう…
>>> import cv2
>>> img  = cv2.imread("Amanda.png")
>>> cv2.imshow('Amanda', img)
>>> cv2.waitKey(1)  # ここでウィンドウが表示されるものの、ウィンドウはレインボーカーソルが回転するだけでなにもできない
-1
>>> cv2.destroyAllWindows() # 消えてもくれない
C++(コマンドライン&Xcode)
#include <cv.h>  // <opencv/cv.h>も可
#include <highgui.h>  // 同上

int main (int argc, char **argv)
{
  cv::Mat a;
  CvCapture *capture = NULL;
   :
コマンドラインだと下のようにしてビルドできます。pkg-config opencv --cflagsとpkg-config opencv --libsの結果をフラグ設定するのがポイントです(本記事の末尾にこれらコマンドの結果も載せておきました)。
% clang++ my1stOpenCV.cpp `pkg-config opencv --cflags` `pkg-config opencv --libs` -o cv
Xcodeで使う
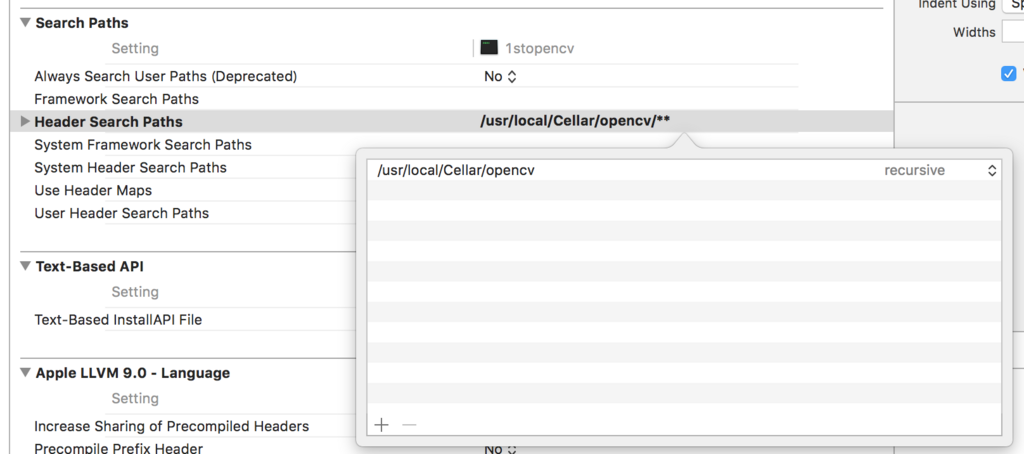
Xcodeで使用する場合、ヘッダーサーチパス(Header Search Paths)と、リンクするライブラリの2箇所を指定します。
ヘッダーサーチパスには、/usr/local/Cellar/opencvをrecursiveで指定します。

ライブラリは/usr/local/Cellar/opencv/3.4.0_1/libをFinderで開き(メニューバーの[移動]→[フォルダへ移動 …]で「/usr/local/Cellar/opencv/」を入力して辿ると楽)、必要なdylibファイルをリンクします。cv2::imread()による画像の読み込み、画像の簡単な加工、表示を行う程度であれば、次の4つをリンクしておけばOKでした。
- libopencv_core.dylib
- libopencv_highgui.dylib
- libopencv_imgcodecs.dylib
- libopencv_imgproc.dylib

まとめ
- OpenCVのインストールにはHomebrewを使うのが簡単
- 今(2018/1/20)は
brew tap homebrew/scienceは不要。brew install opencvのみでOK。
参考サイト
以下2つの方法にあるbrew tap、インストールオプションは不要でした。
C++でビルドしたい場合の方法はそのまま使えました。
homebrewの、opencvのFormula。オプションなどもありません。
補足
A: OpenCVインストールログ
% brew install opencv
==> Installing dependencies for opencv: eigen, lame, x264, xvid, ffmpeg, jpeg, libpng, libtiff, ilmbase, openexr, pkg-config, readline, sqlite, gdbm, openssl, python, xz, python3, numpy, tbb
==> Installing opencv dependency: eigen
==> Downloading https://homebrew.bintray.com/bottles/eigen-3.3.4.high_sierra.bot
######################################################################## 100.0%
==> Pouring eigen-3.3.4.high_sierra.bottle.tar.gz
🍺  /usr/local/Cellar/eigen/3.3.4: 486 files, 6.5MB
==> Installing opencv dependency: lame
==> Downloading https://homebrew.bintray.com/bottles/lame-3.99.5.high_sierra.bot
######################################################################## 100.0%
==> Pouring lame-3.99.5.high_sierra.bottle.1.tar.gz
🍺  /usr/local/Cellar/lame/3.99.5: 27 files, 2MB
==> Installing opencv dependency: x264
==> Downloading https://homebrew.bintray.com/bottles/x264-r2795.high_sierra.bott
######################################################################## 100.0%
==> Pouring x264-r2795.high_sierra.bottle.tar.gz
🍺  /usr/local/Cellar/x264/r2795: 11 files, 3.2MB
==> Installing opencv dependency: xvid
==> Downloading https://homebrew.bintray.com/bottles/xvid-1.3.5.high_sierra.bott
######################################################################## 100.0%
==> Pouring xvid-1.3.5.high_sierra.bottle.tar.gz
🍺  /usr/local/Cellar/xvid/1.3.5: 10 files, 1.2MB
==> Installing opencv dependency: ffmpeg
==> Downloading https://homebrew.bintray.com/bottles/ffmpeg-3.4.1.high_sierra.bo
######################################################################## 100.0%
==> Pouring ffmpeg-3.4.1.high_sierra.bottle.tar.gz
🍺  /usr/local/Cellar/ffmpeg/3.4.1: 248 files, 50.9MB
==> Installing opencv dependency: jpeg
==> Downloading https://homebrew.bintray.com/bottles/jpeg-9b.high_sierra.bottle.
######################################################################## 100.0%
==> Pouring jpeg-9b.high_sierra.bottle.tar.gz
🍺  /usr/local/Cellar/jpeg/9b: 20 files, 723.8KB
==> Installing opencv dependency: libpng
==> Downloading https://homebrew.bintray.com/bottles/libpng-1.6.34.high_sierra.b
######################################################################## 100.0%
==> Pouring libpng-1.6.34.high_sierra.bottle.tar.gz
🍺  /usr/local/Cellar/libpng/1.6.34: 26 files, 1.2MB
==> Installing opencv dependency: libtiff
==> Downloading https://homebrew.bintray.com/bottles/libtiff-4.0.9_1.high_sierra
######################################################################## 100.0%
==> Pouring libtiff-4.0.9_1.high_sierra.bottle.tar.gz
🍺  /usr/local/Cellar/libtiff/4.0.9_1: 246 files, 3.5MB
==> Installing opencv dependency: ilmbase
==> Downloading https://homebrew.bintray.com/bottles/ilmbase-2.2.0.high_sierra.b
######################################################################## 100.0%
==> Pouring ilmbase-2.2.0.high_sierra.bottle.3.tar.gz
🍺  /usr/local/Cellar/ilmbase/2.2.0: 363 files, 5.5MB
==> Installing opencv dependency: openexr
==> Downloading https://homebrew.bintray.com/bottles/openexr-2.2.0.high_sierra.b
######################################################################## 100.0%
==> Pouring openexr-2.2.0.high_sierra.bottle.1.tar.gz
🍺  /usr/local/Cellar/openexr/2.2.0: 132 files, 11.1MB
==> Installing opencv dependency: pkg-config
==> Downloading https://homebrew.bintray.com/bottles/pkg-config-0.29.2.high_sier
######################################################################## 100.0%
==> Pouring pkg-config-0.29.2.high_sierra.bottle.tar.gz
🍺  /usr/local/Cellar/pkg-config/0.29.2: 11 files, 627.2KB
==> Installing opencv dependency: readline
==> Downloading https://homebrew.bintray.com/bottles/readline-7.0.3_1.high_sierr
######################################################################## 100.0%
==> Pouring readline-7.0.3_1.high_sierra.bottle.tar.gz
==> Caveats
This formula is keg-only, which means it was not symlinked into /usr/local,
because macOS provides the BSD libedit library, which shadows libreadline.
In order to prevent conflicts when programs look for libreadline we are
defaulting this GNU Readline installation to keg-only..

For compilers to find this software you may need to set:
    LDFLAGS:  -L/usr/local/opt/readline/lib
    CPPFLAGS: -I/usr/local/opt/readline/include

==> Summary
🍺  /usr/local/Cellar/readline/7.0.3_1: 46 files, 1.5MB
==> Installing opencv dependency: sqlite
==> Downloading https://homebrew.bintray.com/bottles/sqlite-3.21.0.high_sierra.b
######################################################################## 100.0%
==> Pouring sqlite-3.21.0.high_sierra.bottle.tar.gz
==> Caveats
This formula is keg-only, which means it was not symlinked into /usr/local,
because macOS provides an older sqlite3.

If you need to have this software first in your PATH run:
  echo 'export PATH="/usr/local/opt/sqlite/bin:$PATH"' >> ~/.bash_profile

For compilers to find this software you may need to set:
    LDFLAGS:  -L/usr/local/opt/sqlite/lib
    CPPFLAGS: -I/usr/local/opt/sqlite/include
For pkg-config to find this software you may need to set:
    PKG_CONFIG_PATH: /usr/local/opt/sqlite/lib/pkgconfig

==> Summary
🍺  /usr/local/Cellar/sqlite/3.21.0: 11 files, 3.0MB
==> Installing opencv dependency: gdbm
==> Downloading https://homebrew.bintray.com/bottles/gdbm-1.14.1_1.high_sierra.b
######################################################################## 100.0%
==> Pouring gdbm-1.14.1_1.high_sierra.bottle.tar.gz
🍺  /usr/local/Cellar/gdbm/1.14.1_1: 20 files, 555.7KB
==> Installing opencv dependency: openssl
==> Downloading https://homebrew.bintray.com/bottles/openssl-1.0.2n.high_sierra.
######################################################################## 100.0%
==> Pouring openssl-1.0.2n.high_sierra.bottle.tar.gz
==> Caveats
A CA file has been bootstrapped using certificates from the SystemRoots
keychain. To add additional certificates (e.g. the certificates added in
the System keychain), place .pem files in
  /usr/local/etc/openssl/certs

and run
  /usr/local/opt/openssl/bin/c_rehash

This formula is keg-only, which means it was not symlinked into /usr/local,
because Apple has deprecated use of OpenSSL in favor of its own TLS and crypto libraries.

If you need to have this software first in your PATH run:
  echo 'export PATH="/usr/local/opt/openssl/bin:$PATH"' >> ~/.bash_profile

For compilers to find this software you may need to set:
    LDFLAGS:  -L/usr/local/opt/openssl/lib
    CPPFLAGS: -I/usr/local/opt/openssl/include
For pkg-config to find this software you may need to set:
    PKG_CONFIG_PATH: /usr/local/opt/openssl/lib/pkgconfig

==> Summary
🍺  /usr/local/Cellar/openssl/1.0.2n: 1,792 files, 12.3MB
==> Installing opencv dependency: python
Warning: Building python from source:
  The bottle needs the Apple Command Line Tools to be installed.
  You can install them, if desired, with:
    xcode-select --install

==> Downloading https://www.python.org/ftp/python/2.7.14/Python-2.7.14.tar.xz
######################################################################## 100.0%
==> ./configure --prefix=/usr/local/Cellar/python/2.7.14_2 --enable-ipv6 --datar
==> make
==> make install PYTHONAPPSDIR=/usr/local/Cellar/python/2.7.14_2
==> make frameworkinstallextras PYTHONAPPSDIR=/usr/local/Cellar/python/2.7.14_2/
==> Downloading https://files.pythonhosted.org/packages/a4/c8/9a7a47f683d54d83f6
######################################################################## 100.0%
==> Downloading https://files.pythonhosted.org/packages/11/b6/abcb525026a4be042b
######################################################################## 100.0%
==> Downloading https://files.pythonhosted.org/packages/fa/b4/f9886517624a4dcb81
######################################################################## 100.0%
==> /usr/local/Cellar/python/2.7.14_2/bin/python2 -s setup.py --no-user-cfg inst
==> /usr/local/Cellar/python/2.7.14_2/bin/python2 -s setup.py --no-user-cfg inst
==> /usr/local/Cellar/python/2.7.14_2/bin/python2 -s setup.py --no-user-cfg inst
==> Caveats
This formula installs a python2 executable to /usr/local/bin.
If you wish to have this formula's python executable in your PATH then add
the following to ~/.bash_profile:
  export PATH="/usr/local/opt/python/libexec/bin:$PATH"

Pip and setuptools have been installed. To update them
  pip2 install --upgrade pip setuptools

You can install Python packages with
  pip2 install <package>

They will install into the site-package directory
  /usr/local/lib/python2.7/site-packages

See: https://docs.brew.sh/Homebrew-and-Python.html
==> Summary
🍺  /usr/local/Cellar/python/2.7.14_2: 6,344 files, 87.6MB, built in 3 minutes 28 seconds
==> Installing opencv dependency: xz
==> Downloading https://homebrew.bintray.com/bottles/xz-5.2.3.high_sierra.bottle
######################################################################## 100.0%
==> Pouring xz-5.2.3.high_sierra.bottle.tar.gz
🍺  /usr/local/Cellar/xz/5.2.3: 92 files, 1.4MB
==> Installing opencv dependency: python3
Warning: Building python3 from source:
  The bottle needs the Apple Command Line Tools to be installed.
  You can install them, if desired, with:
    xcode-select --install

==> Downloading https://www.python.org/ftp/python/3.6.4/Python-3.6.4.tar.xz
######################################################################## 100.0%
==> ./configure --prefix=/usr/local/Cellar/python3/3.6.4_2 --enable-ipv6 --datar
==> make
==> make install PYTHONAPPSDIR=/usr/local/Cellar/python3/3.6.4_2
==> make frameworkinstallextras PYTHONAPPSDIR=/usr/local/Cellar/python3/3.6.4_2/
==> Downloading https://files.pythonhosted.org/packages/a4/c8/9a7a47f683d54d83f6
######################################################################## 100.0%
==> Downloading https://files.pythonhosted.org/packages/11/b6/abcb525026a4be042b
######################################################################## 100.0%
==> Downloading https://files.pythonhosted.org/packages/fa/b4/f9886517624a4dcb81
######################################################################## 100.0%
==> /usr/local/Cellar/python3/3.6.4_2/bin/python3 -s setup.py --no-user-cfg inst
==> /usr/local/Cellar/python3/3.6.4_2/bin/python3 -s setup.py --no-user-cfg inst
==> /usr/local/Cellar/python3/3.6.4_2/bin/python3 -s setup.py --no-user-cfg inst
==> Caveats
Pip, setuptools, and wheel have been installed. To update them
  pip3 install --upgrade pip setuptools wheel

You can install Python packages with
  pip3 install <package>

They will install into the site-package directory
  /usr/local/lib/python3.6/site-packages

See: https://docs.brew.sh/Homebrew-and-Python.html
==> Summary
🍺  /usr/local/Cellar/python3/3.6.4_2: 7,987 files, 111.4MB, built in 3 minutes 8 seconds
==> Installing opencv dependency: numpy
==> Downloading https://homebrew.bintray.com/bottles/numpy-1.14.0.high_sierra.bo
######################################################################## 100.0%
==> Pouring numpy-1.14.0.high_sierra.bottle.tar.gz
==> Caveats
Python modules have been installed and Homebrew's site-packages is not
in your Python sys.path, so you will not be able to import the modules
this formula installed. If you plan to develop with these modules,
please run:
  mkdir -p /Users/hirohito/Library/Python/2.7/lib/python/site-packages
  echo 'import site; site.addsitedir("/usr/local/lib/python2.7/site-packages")' >> /Users/hirohito/Library/Python/2.7/lib/python/site-packages/homebrew.pth
==> Summary
🍺  /usr/local/Cellar/numpy/1.14.0: 939 files, 22.5MB
==> Installing opencv dependency: tbb
==> Downloading https://homebrew.bintray.com/bottles/tbb-2018_U2.high_sierra.bot
######################################################################## 100.0%
==> Pouring tbb-2018_U2.high_sierra.bottle.tar.gz
==> Caveats
Python modules have been installed and Homebrew's site-packages is not
in your Python sys.path, so you will not be able to import the modules
this formula installed. If you plan to develop with these modules,
please run:
  mkdir -p /Users/hirohito/Library/Python/2.7/lib/python/site-packages
  echo 'import site; site.addsitedir("/usr/local/lib/python2.7/site-packages")' >> /Users/hirohito/Library/Python/2.7/lib/python/site-packages/homebrew.pth
==> Summary
🍺  /usr/local/Cellar/tbb/2018_U2: 128 files, 2MB
==> Installing opencv
==> Downloading https://homebrew.bintray.com/bottles/opencv-3.4.0_1.high_sierra.
######################################################################## 100.0%
==> Pouring opencv-3.4.0_1.high_sierra.bottle.tar.gz
==> Caveats
Python modules have been installed and Homebrew's site-packages is not
in your Python sys.path, so you will not be able to import the modules
this formula installed. If you plan to develop with these modules,
please run:
  mkdir -p /Users/hirohito/Library/Python/2.7/lib/python/site-packages
  echo 'import site; site.addsitedir("/usr/local/lib/python2.7/site-packages")' >> /Users/hirohito/Library/Python/2.7/lib/python/site-packages/homebrew.pth
==> Summary
🍺  /usr/local/Cellar/opencv/3.4.0_1: 531 files, 97.7MB
%
B: pkg-config opencv --cflags/--libsの結果
% echo `pkg-config opencv --cflags`
-I/usr/local/Cellar/opencv/3.4.0_1/include/opencv -I/usr/local/Cellar/opencv/3.4.0_1/include
% echo  `pkg-config opencv --libs`
-L/usr/local/Cellar/opencv/3.4.0_1/lib -lopencv_stitching -lopencv_superres -lopencv_videostab -lopencv_aruco -lopencv_bgsegm -lopencv_bioinspired -lopencv_ccalib -lopencv_dpm -lopencv_face -lopencv_photo -lopencv_fuzzy -lopencv_img_hash -lopencv_line_descriptor -lopencv_optflow -lopencv_reg -lopencv_rgbd -lopencv_saliency -lopencv_stereo -lopencv_structured_light -lopencv_phase_unwrapping -lopencv_surface_matching -lopencv_tracking -lopencv_datasets -lopencv_text -lopencv_dnn -lopencv_plot -lopencv_xfeatures2d -lopencv_shape -lopencv_video -lopencv_ml -lopencv_ximgproc -lopencv_calib3d -lopencv_features2d -lopencv_highgui -lopencv_videoio -lopencv_flann -lopencv_xobjdetect -lopencv_imgcodecs -lopencv_objdetect -lopencv_xphoto -lopencv_imgproc -lopencv_core
Swift3でインスタンスから型メソッドを呼ぶ
ある型(class/struct)のインスタンスを使って型メソッドを呼ぶには、type(of:)関数を使います。
class Foo {
    static var bar: Int { return 100 }
}

let foo = Foo()
foo.bar // error: static member 'bar' cannot be used on instance of type 'Foo'
type(of: foo).bar  // 100
上のコンパイルエラーになっている箇所のようにfoo.barとは呼べないので注意。あと、Swift2で使えていたdynamicTypeプロパティはSwift3では使えないので、こちらも注意です。
SKView&SKSceneを画面の回転に対応させる
iOSデバイスを回転させたときに、SpriteKitで使うSKViewやSKSceneをどうやって・どのタイミングで追従させるかについてです。
SpriteKitの中で完結させようとなると、SKSceneが持つdidChangeSize(CGSize)メソッドを使うべきなのでしょう。しかしこのメソッドはサブクラスでオーバーライドしてあげないと使えず、デリゲートで外から制御させることができません。回転のためだけにオレオレスーパーSKSceneを作るのもなんだかなあと調べていたら、UIViewControllerのviewWillTransition(to:with:)を使う方法がStackOverflowで紹介されていて便利だったのでこちらでも紹介します。
Swiftで書くとしたら次のようになります。
override func viewWillTransition(to size: CGSize, with coordinator: UIViewControllerTransitionCoordinator) {
    // SKViewの調整 (※AutoLayout設定済みなら不要)
    skView.frame = CGRect(x: 0, y: 0, width: size.width, height: size.height)
    // SKSceneのサイズをSKViewに合わせる
    currentScene.size = size

    // 新しい画面サイズで修正が必要な処理の実行
}
viewWillTransition(to:with:)もサブクラスでオーバーライドして使うものとはいえ、ビューコントローラはたいていサブクラスで運用しているので、ずっと気軽に使えます。
ジャンプするSKActionを作る
SKActionには「ジャンプする」を表すアクションがなかったので作ってみました。
public extension SKAction {
    class func jump(height: CGFloat, duration seconds: TimeInterval) -> SKAction {
        var initialY: CGFloat = 0.0
        var initialFlag = true

        let customAction = SKAction.customAction(withDuration: seconds) {
            node, elapsedTime in
            if initialFlag == true {
                initialFlag = false
                initialY = node.position.y
            }

            let t = elapsedTime/CGFloat(seconds)

            let y: CGFloat
            if t > 0.9995 {
                y = 0
            } else {
                y = -4 * height * t * (t - 1)
            }
            node.position.y = initialY + y
        }
        return customAction
    }
}
パラメータに「ジャンプの高さ」と「滞空時間」を設定すると、その場でジャンプしてくれます。
let jump = SKAction.jump(height: 100, duration: 1.0) // 100ptの高さで1.0秒ジャンプする
node.run(jump)
理屈は簡単で、滞空時間を0-1で正規化した後、(0,0),(ジャンプの高さ,1),(1,0)の3点を通る2次方程式に当てはめているだけです。 ただしそれだけだと、cocos-2dのジャンプでよくあった「ジャンプを続けるとだんだん位置がずれていく」という、最終位置の誤差が積み重なる問題が出てしまうので、ある程度の時間が立ったら地面におろしてしまうようにしています。
ループ途中で抜ける処理をfilter()等で書き換える
Swiftを触っていると、色々なループをmap/forEachなどで置き換えたくなります。その1パターンの実装例を考えてみます。
目的のデータを探すためのループ
ループ処理のユースケースとして、下例のような「目的の値を取り出すために見つかるまでループ。見つかったら値を保持してbreak」という使い方があります。
let array = Array(0..<1000)

var ret = 0
for i in array {
    if i == 33 {
        ret = i
        break
    }
}
これを何も考えずfilter()で置き換えた場合のコードは次のとおりです。
// filterで目的の値を見つける
let ret1 = array.filter{ $0 == 33 }.first
シンプルですしこれでも良いように思いますが、実はこれだとパフォーマンスの問題を抱えてしまいます。Playgroundなどで実行回数を調べてみると分かりますが、filterは配列全体を一旦スキャンするため、要素数によっては大量の繰り返し処理が紛れ込むことになってしまうからです。
// filterで目的の値を見つける
let ret1 = array.filter{ $0 == 33 }.first // 1001times !
配列のサイズが数万だった場合には目も当てられません。無駄な処理を避けて、見つかったところで繰り返しを抜けるにはどうしたらいいでしょうか。
lazy
この場合、lazy を配列に付けてあげます。すると配列の値がオンデマンドで参照されるようになり、繰り返しが必要なところまでで止まります。
// lazy化した配列を使い、filterで目的の値を見つける
let ret1 = array.lazy.filter{ $0 == 33 }.first // 35times
上記のソースではfirstが得られた時点、つまりfilterがtrueを返した時点で処理が終わり、それ以降は計算が行われません(34でなく35になっているのは、lazy)。
余分な処理を実行しなくてもすむようになりました。
他の方法があればぜひコメントなどで教えてください🙇